pico-infonesPlus NES emulator
Flash the Fruit Jam-specific pico-infonesPlus v0.53 UF2 to run lawful NES and Famicom Disk System images from microSD.
View original project ↗What you’re building
pico-infonesPlus v0.53 turns the exact Adafruit Fruit Jam product 6200 into a focused NES and Famicom Disk System emulator. The GPL-3.0 source release supplies a Fruit Jam-specific ARM UF2, and the project’s hardware matrix records the RP2350 ARM configuration as working with HSTX video, I2S audio and PIO USB. Games load from a FAT32 or exFAT microSD card into the board’s 8 MB PSRAM, with an on-screen browser, recently played list, battery-backed save persistence, mapper-dependent manual save states, nine selectable colour palettes, NTSC/PAL/Dendy modes and optional NSF music playback. Save states are documented only for common NES mappers 0–4 and are not supported for Famicom Disk System games. Save RAM reaches the card only after Quit game is selected from the in-game settings menu; resetting or powering off first loses changes since the previous save. Version 0.53 adds more cartridge mappers and compatibility fixes, but Datach barcode input is not supported and the project records a remaining visual issue in Over Obj. The firmware overclocks the RP2350 and the maintainer warns that this can reduce device life. For the documented Fruit Jam path, use one supported USB gamepad on USB 1; an optional Wii Classic controller can serve as player two through a STEMMA QT adapter. The project includes no commercial games or Famicom Disk System BIOS. Use only images you are entitled to run, back up the board and card first, and select the release asset whose name begins piconesPlus_AdafruitFruitJam and ends arm_piousb.uf2 rather than a build for another board.
Key steps
- Back up any Fruit Jam firmware and microSD files you need, open release v0.53, and download the Fruit Jam ARM PIO-USB UF2. Verify it against the full SHA-256 listed under Components; do not substitute one of the many Pico, Metro, Waveshare or RISC-V assets.
- Format the microSD card as FAT32 or exFAT, create /roms/NES, and add only lawful .nes images. For lawful Famicom Disk System images, also place your own exactly 8 KB BIOS at /bios/fds-bios.rom.
- Connect the Fruit Jam by USB-C, hold Reset and Button 1 to expose the RPI-RP2 drive, copy the Fruit Jam UF2 to that drive, and wait for the board to reboot before disconnecting it.
- Power off, insert the prepared card, connect a DVI-compatible display and attach one supported gamepad to USB 1. If required, attach a Wii Classic controller through the STEMMA QT adapter.
- Power on, select a small known-good image from /roms/NES, and verify video, controls and sound. For a game with save RAM, press SELECT + START and choose Quit game before resetting or powering off, then relaunch it to verify persistence. Disable External Audio for HDMI sound; enable it for the included or external analogue speaker path.
- Review the project’s overclock warning and current known issues. Treat unsupported mappers, Datach barcode input and the documented Over Obj visual defect as emulator limits rather than setup faults.
Original project and code
Original project pages, manufacturer documentation and repositories used while preparing this page. Last reviewed .
Hardware for this project
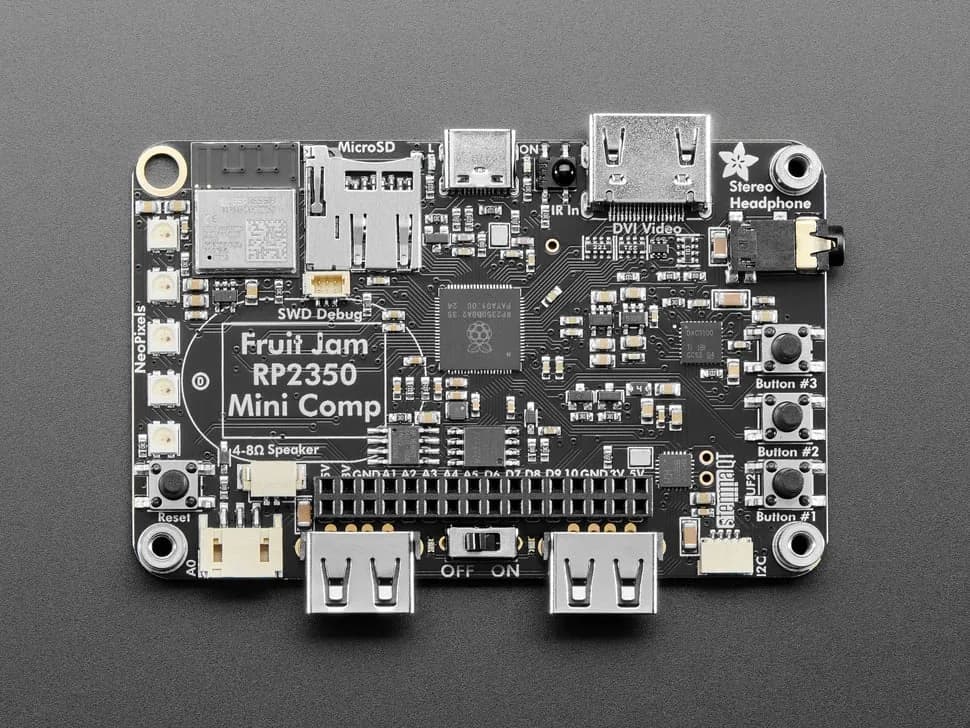
Fruit Jam
Credit-card-sized RP2350B computer board with DVI output, USB host, microSD, audio, Wi-Fi coprocessor and GPIO expansion.
- Platform
- Raspberry Pi RP2350B with ESP32-C6 connectivity coprocessor, CircuitPython/Arduino/Pico SDK · Circuitpython
- Builds
- 12