Audio-reactive HSTX video synth
Build a CircuitPython video synth that turns microphone audio into three live DVI animations controlled by knobs and a rotary encoder.
View original project ↗What you’re building
Liz Clark’s exact-board project turns Adafruit Feather RP2350 product 6000 into a 320×240 audio-reactive video synth. CircuitPython samples a PDM microphone at 44.1 kHz, applies a 512-sample fast Fourier transform and renders one of three HSTX DVI animations: spectrum bars, bouncing circles or an animated party parrot. A STEMMA QT rotary encoder selects the mode and its push switch toggles live controls; three analog potentiometers adjust colour, sensitivity, smoothing or shape size according to the active animation. The guide uses the no-PSRAM Feather, a 22-pin HSTX-to-DVI adapter and cable, and a DVI-compatible HDMI display. This is a wired electronics build rather than a board-only firmware install: the microphone and three potentiometers must be soldered to the documented 3.3 V, ground and signal pins. Install the exact Feather RP2350 CircuitPython build, then copy the guide’s complete project bundle, including its libraries and bitmap. Back up existing CIRCUITPY files first; the guide’s flash-reset UF2 is a destructive recovery tool, not a routine installation step.
Key steps
- Confirm that the board is Adafruit product 6000 without PSRAM, back up any CIRCUITPY files you need, and install the current stable adafruit_feather_rp2350 CircuitPython UF2 until CIRCUITPY appears.
- With power disconnected, wire the three potentiometer wipers to A1, A2 and A3; join their positive pins to 3.3 V and their ground pins to GND, insulating the solder joints with heat-shrink tubing.
- Connect the PDM microphone to 3.3 V, GND, D6 clock and D5 data. Connect the rotary encoder to the Feather STEMMA QT port with the I2C cable.
- Unlock the HSTX connectors carefully, attach the 22-pin FPC cable between the Feather and DVI adapter in the orientations shown by the guide, then connect a compatible display.
- Download the guide project bundle and copy its lib folder, code.py and partyParrotsBig.bmp to the root of CIRCUITPY without omitting the bitmap or required libraries.
- Restart the board, verify 320×240 DVI output and microphone response in all three animation modes, then test each potentiometer and the encoder push switch before fitting an enclosure.
Original project and code
Original project pages, manufacturer documentation and repositories used while preparing this page. Last reviewed .
Hardware for this project
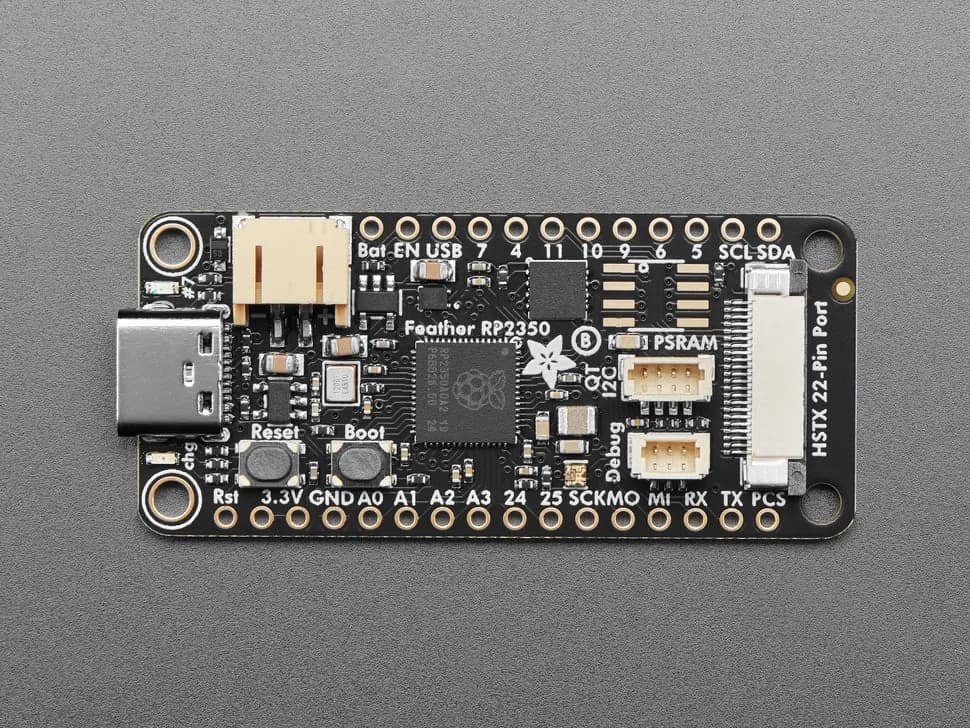
Adafruit Feather RP2350 with HSTX Port
Feather-format RP2350 development board with an HSTX video connector, 8 MB flash, LiPo charging, STEMMA QT, USB-C and 29 accessible GPIO.
- Platform
- Raspberry Pi RP2350 with 8 MB flash, CircuitPython/MicroPython/Arduino/Pico SDK · Circuitpython
- Builds
- 01