Who this is for
People who repeat keyboard-heavy work in editors, design tools, meeting apps or media software and want a tactile, programmable control surface.
Before you start
Have these basics ready before choosing parts or flashing firmware.
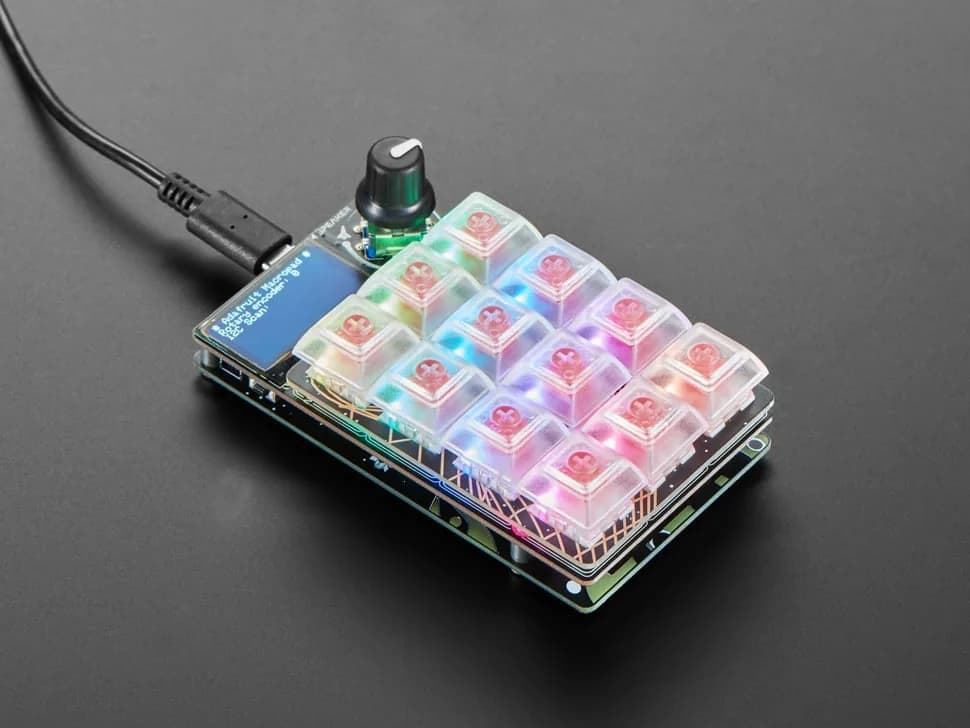
- An Adafruit MacroPad RP2040, compatible key switches and keycaps, and a USB data cable.
- Current CircuitPython firmware plus matching MacroPad and HID libraries.
- A written list of target shortcuts for one application.
Choose the first control layer
Keyboard shortcuts: The app already exposes reliable shortcuts and portability matters.
Consumer control: You need volume, mute, play or other standard media actions.
MIDI: The target audio or creative software maps controls through MIDI.
Script or API trigger: No safe shortcut exists and you can authenticate a local automation explicitly.
Audit repetitive actions
For one week, note commands you repeat and how costly a wrong press would be. Select frequent, reversible actions for the first layer; leave delete, send, deploy and purchase actions on the normal keyboard.
- Prefer commands with visible feedback.
- Group related actions spatially.
Assemble and verify hardware
Install switches and keycaps without bending pins, connect by USB and test each key, the encoder, OLED, speaker and LEDs with the vendor examples.
- Label key positions before writing mappings.
- Keep a spare known-good switch for diagnosis.
Install CircuitPython and libraries
Install the exact board build and matching library bundle. Start from the MacroPad hotkeys guide structure so keys, display labels and profiles remain data rather than scattered conditionals.
- Pin the working CircuitPython major version.
- Keep keymap data separate from device loop code.
Build one application profile
Map three keys first, show the active profile and key labels on the OLED, and release every HID key after sending a chord. Test in a blank document before using the target app.
- Include an obvious “no action” slot.
- Use short LED feedback for accepted input.
Use the encoder safely
Map rotation to volume, zoom or another bounded repeated action and the encoder press to a reversible toggle. Add debouncing and rate limiting so one movement cannot flood the host.
- Test slow and fast turns.
- Do not map rotation directly to destructive commands.
Add layers and maintainability
Add one profile selector only after the first profile is stable. Store labels and keycodes together, document OS-specific shortcut differences and keep a recovery copy of code.py.
- Show the active layer at all times.
- Version the keymap with a short change log.
Safety and workflow notes
A macro pad acts as a keyboard and can trigger anything the focused application accepts. Avoid credentials, irreversible actions and unattended automation; require a confirmation in the host application for sending, deleting, deploying or purchasing.
- Test macros in a disposable document.
- Do not store passwords or tokens in keymap files.
- Use accessibility features responsibly and avoid automating systems contrary to workplace policy.
Troubleshooting
A key repeats or sticks logically. Ensure the code releases HID keys, add debouncing and test the physical switch.
Shortcuts work on one OS but not another. Create explicit OS profiles and translate modifier keys rather than detecting or guessing silently.
The board enters a crash loop. Open the serial console, restore a minimal code.py and verify library-version compatibility.
Next steps
Keep the next experiment small and reproducible.
- Ship a three-key profile.
- Add encoder volume control.
- Run it for a week and replace unused mappings before adding layers.